
There’s a reason dry cleaning is trusted for stain removal, and it’s all because of the solvent behind the process. But what most people don’t see is the real work that happens before clothing pieces ever touch the solvent. That behind-the-scenes step is called pretreatment, and it’s where the professionals identify the stain, choose the right solution, and prep the fabric to respond properly during cleaning.
Skip this step, and even professional solvents can leave you with disappointing results. In this post, let’s break down what goes into effective pretreatment and why it’s the foundation of stain removal success.
When a professional dry cleaner receives a garment with a visible stain, or even one with a potential hidden stain, the very first step they take is pretreatment. Pretreatment is where experience meets precision, and it’s often the reason your favorite outfit comes back looking brand new instead of permanently marked.
Following is a clear, step-by-step breakdown of how this process actually works in professional dry cleaning settings.
Every item brought into a dry cleaner, whether it’s a silk blouse, a wedding dress, or a leather jacket, is first inspected under bright lighting. The cleaner checks for:
Professionals are trained to look for common problem areas, including underarms, hems, collars, cuffs, and linings. These areas often hide stains that aren’t immediately visible.
Once the stains are located, cleaners try to determine what caused them. Why does that matter? Because not all stains are treated the same way. Knowing the stain type allows cleaners to pick the proper solution and method to remove it.
When you drop off clothes at your local dry cleaners, give them as much info as possible. Saying, “This is from red wine at my friend’s wedding,” is way more helpful than just saying, “I think there’s a stain.”
This step is where experience really shines. Cleaners must understand how different fabrics react to chemicals and moisture, such as:
The cleaner may perform a spot test on an inside seam to ensure the solution won’t cause color bleeding or damage.
Armed with information about the stain and the fabric, cleaners then choose the correct spotting agent. These solutions are formulated specifically to break down certain stain types without hurting the fabric.
These are not your typical household stain removers. Professional agents are stronger, more effective, and used with the right tools for precise application.
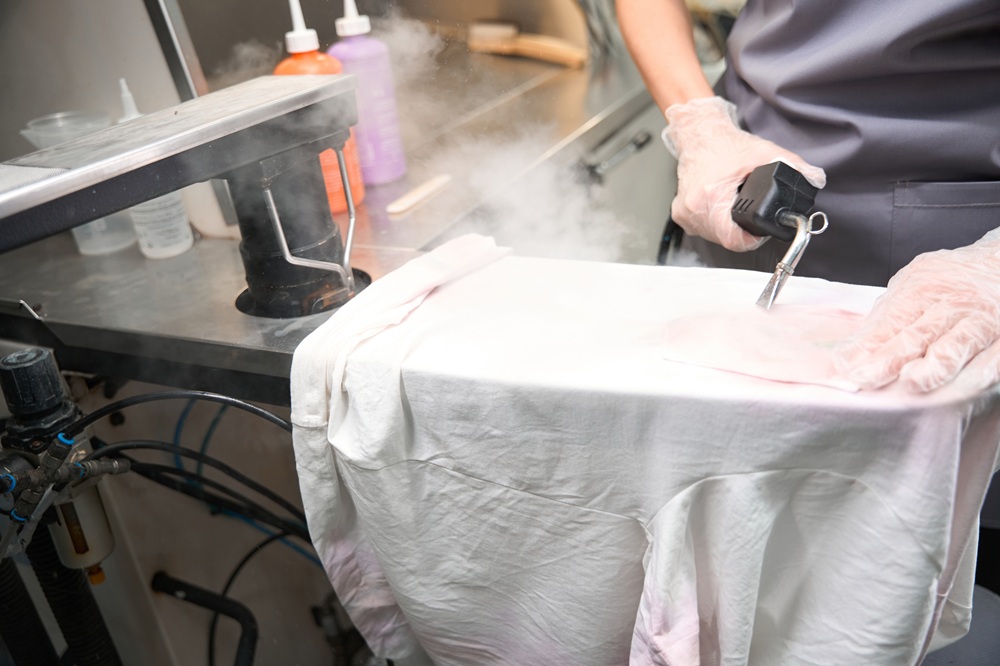
Once the solution is chosen, the cleaner uses a spotting board – a special work surface designed for stain removal. They:
For delicate garments like wedding dresses, cleaners might use cotton swabs, eye droppers, or hand-cleaning techniques to protect beading or lace.
After the treatment is applied, the cleaner usually uses steam or air suction to rinse the area and remove any leftover chemicals. If needed, they apply a neutralizer to balance the pH of the fabric and prevent future yellowing or residue buildup.
This is especially important for light-colored garments like bridalwear or white shirts, which can discolor if treated improperly.
Once the pretreatment is completed, the cleaner gives the item one last look before it enters the machine. If everything looks good, the garment goes into the dry cleaning or wet cleaning process. If the stain is still visible or questionable, a second round of pretreatment may take place.
And there you have it – a professional-grade pretreatment routine that’s methodical, customized, and way beyond what you’d do at home with a spray bottle and wishful thinking.
If you wonder whether pretreatment is really worth it, the short answer is yes, absolutely. It’s the most important step if you want your dry cleaning to be effective. Without it, even the best washing machine or premium detergent won’t fully remove stains, especially the kind you pick up at weddings, fancy dinners, or in everyday life with pets, children, or travel.
So why is pretreatment so essential? Let’s break it down clearly for you.
The biggest risk with untreated stains is that they’ll become permanent, especially if they’re hit with heat during the drying process. Once a stain sets in, even expert cleaners can struggle to get them out. Pretreatment helps lift stains while they’re still “fresh” or at least responsive.
Pro tip: Don’t iron or machine dry anything that has a visible stain. This sets the stain deeper. Take it to your nearest dry cleaners as soon as possible.
Aside from looking bad, stains can also break down fabric fibers over time. Sweat, oil, and food can cause discoloration, odor, and even holes if left untreated. Pretreatment helps prevent all that by neutralizing the damage before it spreads.
This is particularly important for expensive or sentimental garments such as a wedding dress, designer gown, or tailored jacket. It’s also crucial for everyday staples like work shirts or school uniforms that you want to last.
Garments that go through proper pretreatment come out cleaner. They smell better, look brighter, and feel fresher. And you’re not left inspecting your clothes at home, wondering if the stain is still there under certain lighting.
You’ll see better results with dry cleaners that focus on detailed garment care, rather than just rushing through volume. Look for businesses that take their time with customer service and spotting techniques.
If a stain survives the first round of cleaning, you may need to re-clean the item, or worse, replace it. Proper pretreatment helps ensure one trip to the cleaners is all you need. No back-and-forth. No extra charges. No stress over that red wine spill on your beige blouse.
Stains need an expert approach and professional hands to treat them and that’s exactly what Apple Cleaners delivers. Whether it’s your favorite blouse, an heirloom wedding dress, or everyday laundry, our team is trained to handle even the most stubborn spots with care.
Create your C.O.R.E. Account today and schedule a free pickup. Just place your items in a bag, and we handle the rest. We proudly serve St. Louis with eco-friendly dry cleaning services, along with wash and fold laundry, alterations, rug cleaning, and more.
Call us at 888-572-6151, email [email protected], or visit www.applecleaners.com to get started because with Apple Cleaners, getting clean clothes has never been easier!